Wilfred is a Certified Colourlab A.I. Specialist. Colourlab Ai makes color grading fast, easy and simple by automating color-matching and balancing thanks to new and groundbreaking Artificial Intelligence-powered tools.
Colourlab Ai makes color grading fast, easy and simple by automating color-matching and balancing thanks to new and groundbreaking Artificial Intelligence-powered tools.
More Time to Create Easy to understand. Complete control. Camera to Post. Colourlab Ai can effortlessly balance your shots or match scenes across your edited timeline with a single click. Say hello to stunning results in a fraction of the time. From Log, to lush. Hollywood Meets Ai Color Intelligence has established itself as a high-end image processing consultancy, working with major studios and media enterprises on advanced HDR color pipelines and providing specialized color grading plug-ins for look design and creation.
Look Designer 2 Design your cinematic looks with custom Subtractive Color CMY processing and emulate film like never before. Built directly inside Colourlab Ai and as a stand-alone Plugin for DaVinci Resolve™ and Adobe Premiere. Best in Class Film Stock Emulation Look Designer accurately emulates the process associated with film acquisition, development, scanning, and printing. It goes beyond simple Film Emulation LUTs into the world of CMY Subtractive color tools that emulate color processing of real film emulsions. BREAKING LIMITS Color Management Simplified Built for every single workflow. Even the most demanding. Look Designer 2 can pre-match cameras, move from SDR to HDR in a single click, or use ACEScct for the entire color pipeline. Look Designer 2 can create and export stunning Show LUTs via 33 and 65-point cube files with your choice of output device targets. Need an SDR and an HDR version of your look? Simply done.
Grainlab Grainlab is a new texture tool that takes a monumental step towards making the digital negative emulate the natural look of analog film. Grainlab generates grain based on the frame’s content resulting in a living texture that has a more organic look with the authentic behavior of celluloid acquisition. Go Beyond Color The next step in successful film look emulation is the use of texture or film grain. In today’s age of streaming, using grain correctly can have a positive effect on encoding compression and lead to better streaming image quality with more detail.

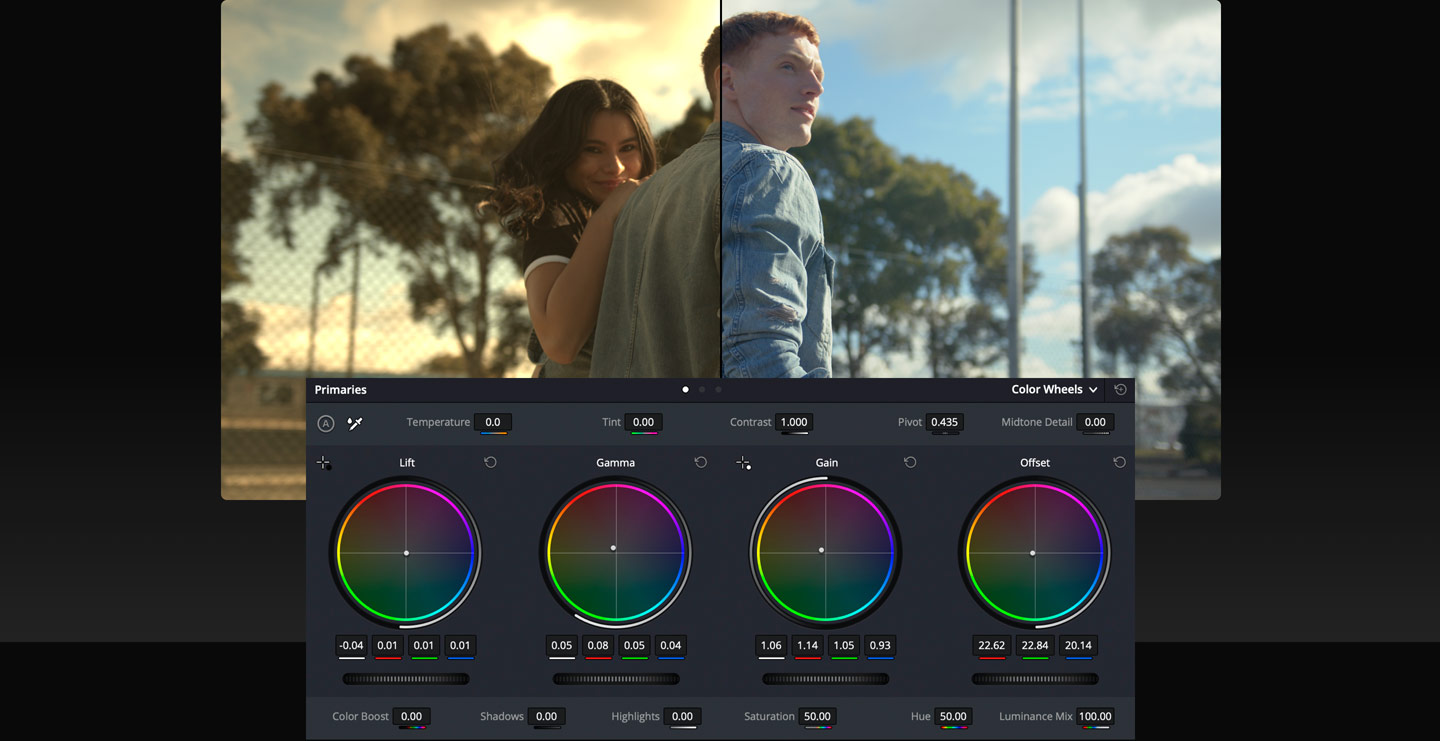
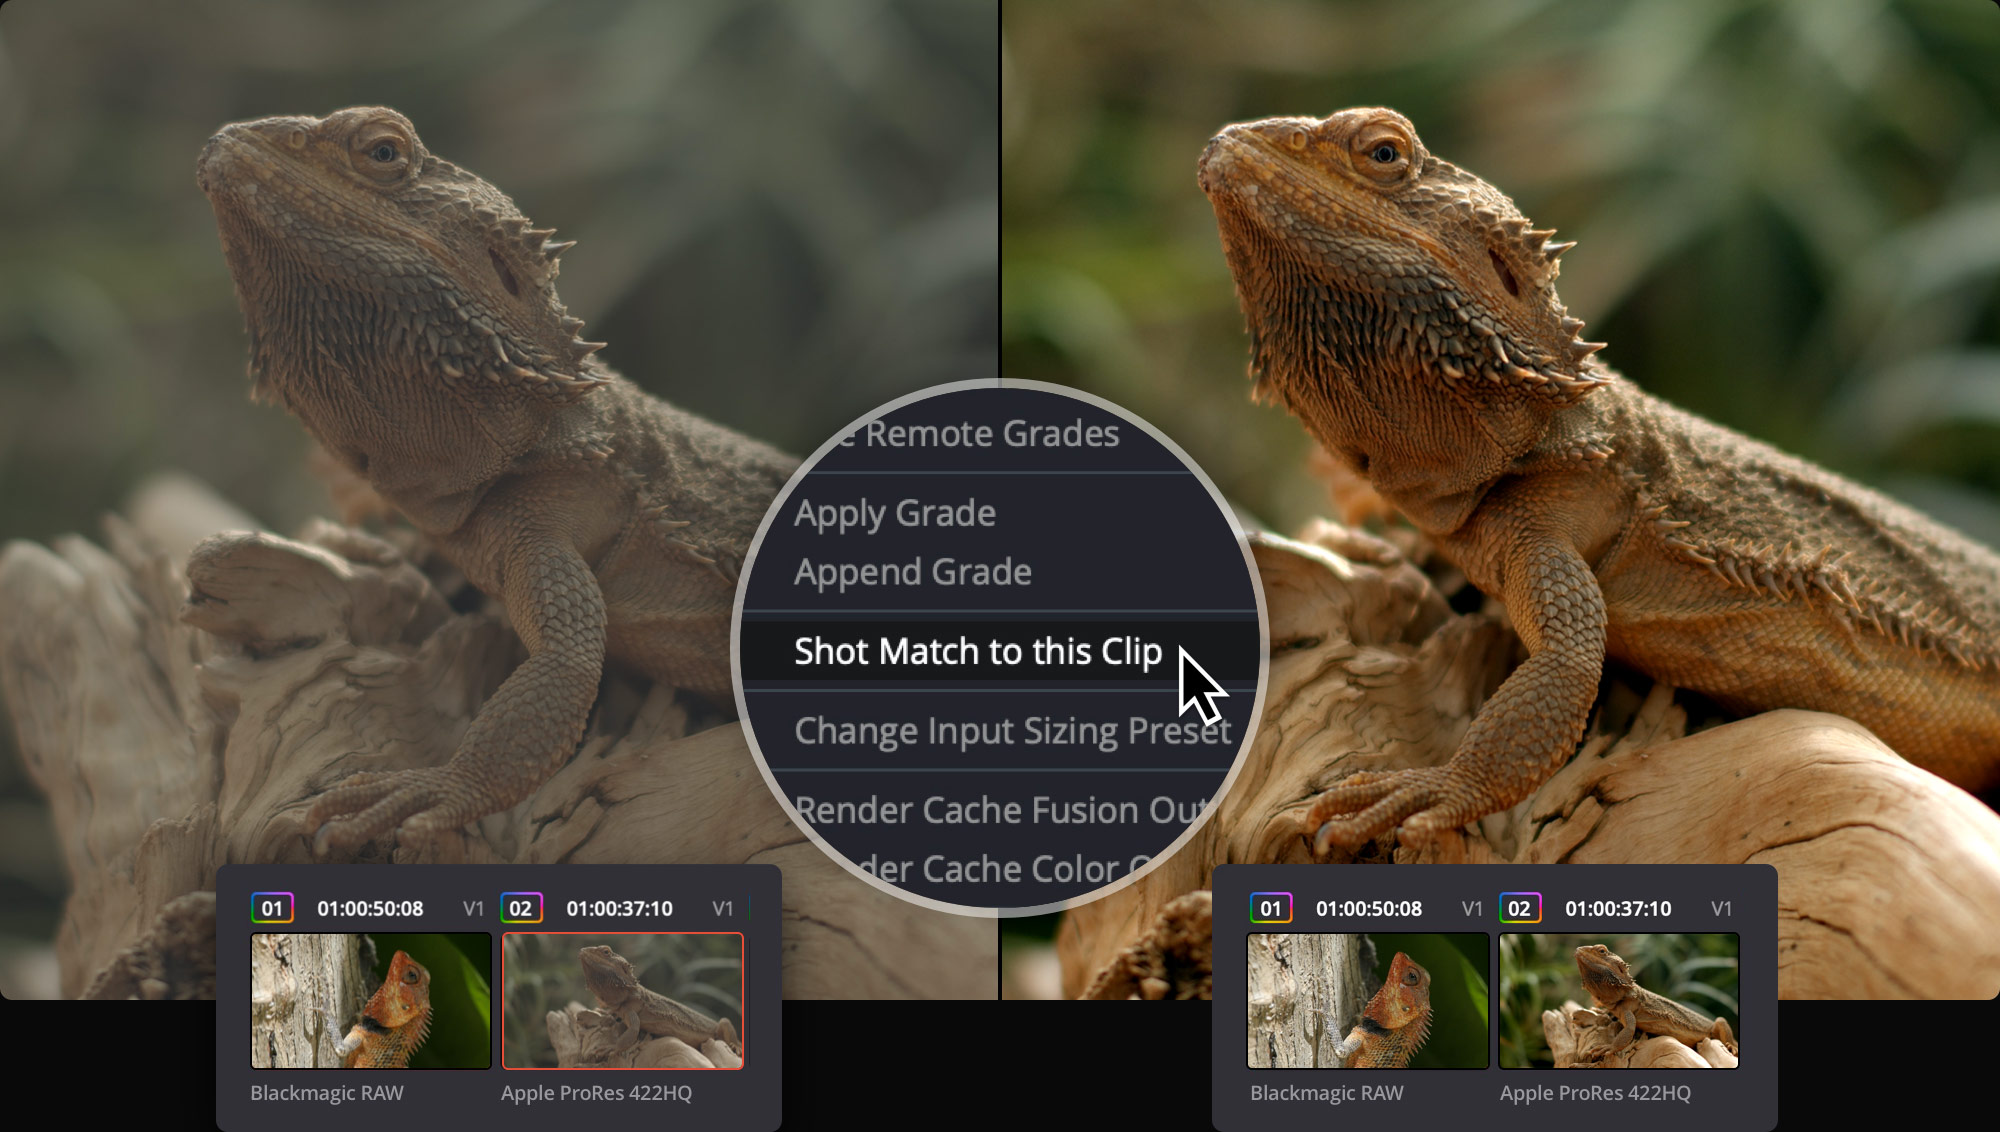
Balanced and matched shots make content from different cameras look consistent. You can use the auto balance tools to quickly balance a group of similar shots. Simply click the auto color button at the left of the color wheels palette to balance the shot’s color and contrast. You can also match the color between different shots. Select a clip, right click on another clip, and select "Shot Match to This Clip" from the menu. Resolve will match the color, contrast and brightness of the clip you’re working on with the one you’ve selected. If a shot contains a chip chart, click on the color match icon in the toolbar, select the type of chart used, line it up on the image and click match!

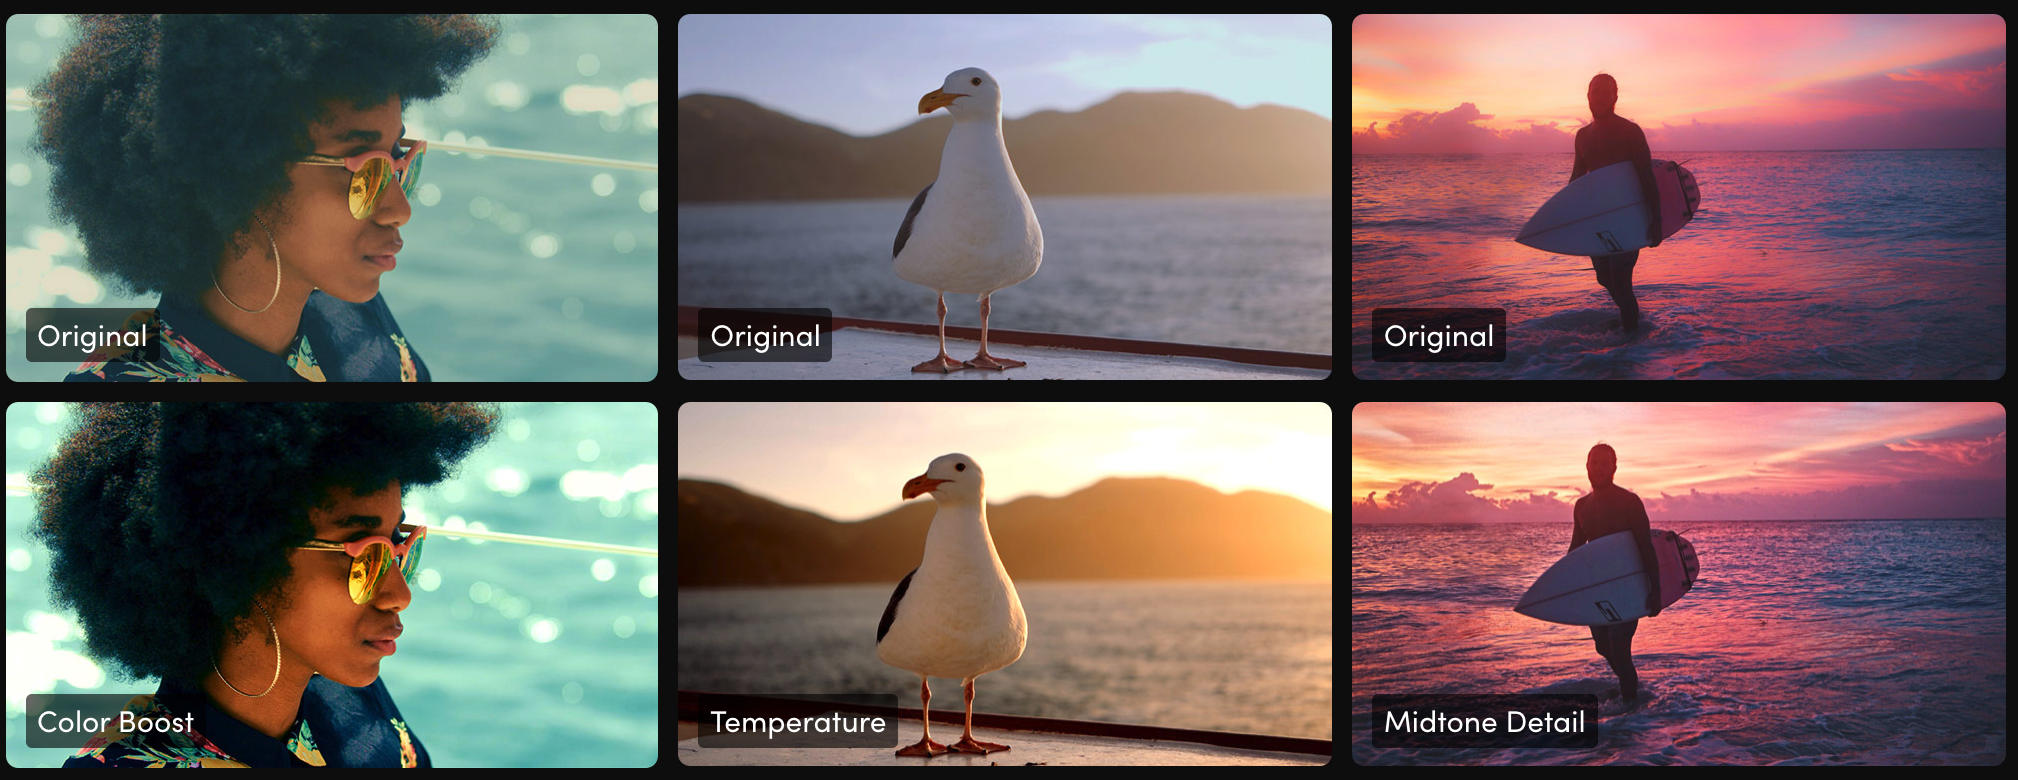
The primary palette contains incredibly powerful primary adjustment possibilities that let you quickly adjust image contrast, saturation, hue, temperature, tint, midtone detail, color boost shadows, highlights and more. They’re an indispensable set of creative tools that I use every day! For example, midtone detail lets you adjust contrast in areas with high edge detail to increase or decrease image definition or sharpness. Color boost, also referred to as vibrance, intelligently adjusts areas of an image with low saturation, resulting in a subtle and more natural looking increase of color.
